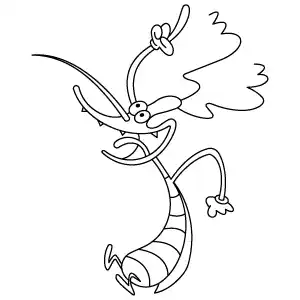
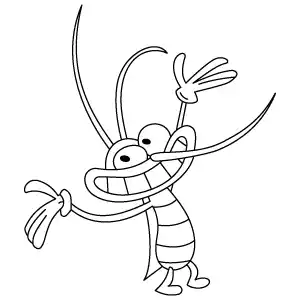
Draw two large overlapping circles close together to form the eyes, and place small dots inside each for the pupils. From between the eyes, sketch a long curved shape extending downward to represent the nose.
Step 2 - Add the Face Shape and Antennae
Outline the character’s broad, smiling mouth extending wide beneath the eyes. Then, draw two large, wavy shapes at the back of the head to represent the antennae, making sure they curve outward for balance.
Step 3 - Draw the Teeth and Tongue
Add sharp triangular teeth evenly along the edge of the mouth to create a wide grin. Inside the mouth, draw the tongue curling upward, giving the expression more character and detail.
Step 4 - Add the Arm and Hand
Draw an arm extending upward from the top of the head, keeping it slim and proportionate. At the end of the arm, sketch a hand with one finger clearly pointing outward, while the other fingers remain bent.
Step 5 - Sketch the Body and Legs
Draw a large curved shape beneath the head to form the base of the character’s body. At the lower end of the body, add feet made of small pointed shapes, keeping them simple and balanced.
Step 6 - Add Patterns and Arms
Draw curved horizontal stripes evenly across the body to add texture and detail. From the upper part of the body, sketch an arm extending outward, finishing it with a hand that has four rounded fingers.
Step 7 - Finalize Marky Drawing
Erase any unnecessary lines and carefully refine the outlines to make them smooth and clean. Review the entire drawing of Marky, ensuring the eyes, mouth, antennae, body, arms, and stripes are all clear, sharp, and expressive for the final look.