Start by drawing two large oval shapes to form Krillin’s eyes. Inside each oval, add a small circle to represent the pupils, giving his eyes more detail. Next, lightly sketch a few whisker-like marks on each cheek to complete the basic facial features.
Step 2 - Add Eyebrows and Mouth
Now, draw two thick, curved eyebrows just above the eyes to give Krillin his expressive look. Below the nose area, sketch his open mouth, showing both the teeth and tongue inside. This will add more personality and bring out his cheerful and energetic look.
Step 3 - Define Head Outline and Ears
Begin by drawing the outline of Krillin’s round head, making sure it is smooth and balanced. Then, carefully add detailed ears on both sides, keeping them proportionate and compatible with the head shape.
Step 4 - Draw the First Fist
Sketch a clenched fist raised up close to Krillin’s head, making sure the overall shape looks firm and strong. Include detailed knuckles and fingers to clearly define the hand and show its structure.
Step 5 - Draw the First Arm with Sleeve
Extend the arm downward starting from the clenched fist, keeping the proportions smooth and natural. Add the rolled-up sleeve at the upper part of the arm to represent Krillin’s clothing and complete the detail.
Step 6 - Draw the Second Arm
Extend the second arm outward to the right, keeping the proportions aligned with the rest of the body.
Step 7 - Add the Second Fist
Sketch the second clenched fist on the opposite side of Krillin’s body, making sure it is positioned clearly and accurately. Keep the size, proportion, and perspective consistent with the first fist for balance.
Step 8 - Draw the Upper Torso
Draw the upper part of Krillin’s clothing, making sure it fits neatly around his body. Add criss-cross patterns on the chest area to show the design details and complete the clothing structure.
Step 9 - Sketch the First Foot
Draw Krillin’s raised left leg, keeping the shape strong and proportionate with the body. Include the shoe at the bottom of the leg, and add small details like folds in the sock to make it complete.
Step 10 - Sketch Krillin’s Other Leg and Pants Pocket
Add the bent knee to show movement, and sketch the detailed pants around it for proper shape. Then, draw the extended right leg with the shoe at the bottom. Finally, include the pants pocket on the left side.
Step 11 - Draw the Second Foot
Draw the second foot at the bottom of the pants. Draw a few lines for the sock and laces detail.
Step 12 - Add Fabric Details to Clothing
Refine the clothing by adding wrinkles and folds in appropriate areas to make the outfit look natural. Emphasize the fabric texture on both the arms and legs, highlighting the flow and movement of Krillin’s clothing.
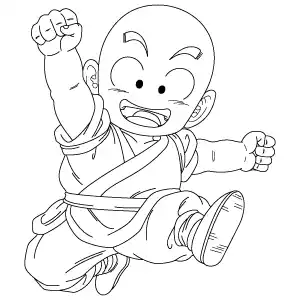
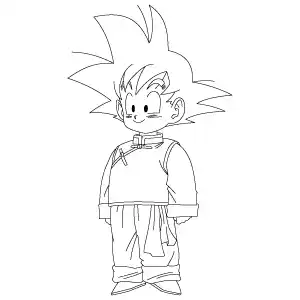
Step 13 - Finalize Krillin Monk Drawing
Complete the final adjustments by carefully refining all the details in the drawing. Erase any remaining sketch lines to clean up the artwork, and then finalize the shading to bring out depth and finish Krillin’s drawing.