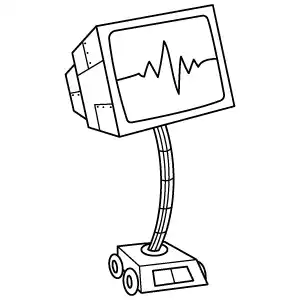
Start by sketching a rectangular screen with slightly rounded edges. This will be Karen's main display.
Step 2 - Add the Screen Back
Draw a second, slightly smaller rectangle behind the first one to give the screen a three-dimensional look.
Step 3 - Stand and Screen Details
Extend a thin, curved stand from the bottom of the screen. Add a small oval or circular joint where the screen connects to the stand. You can also include a few small lines on the back screen to represent Karen's display interface.
Step 4 - Base
Draw the base at the bottom of the stand, making it slightly wider than the stand itself for stability. Also add few lines inside the stand for detail.
Step 5 - Base Details
Add some extra lines and small buttons to the base for a more mechanical and robotic look.
Step 6 - Final Result
Review your drawing and make any necessary adjustments. Ensure the screen, stand, and base all connect smoothly. You can also refine any details on the screen interface to make Karen look more expressive.