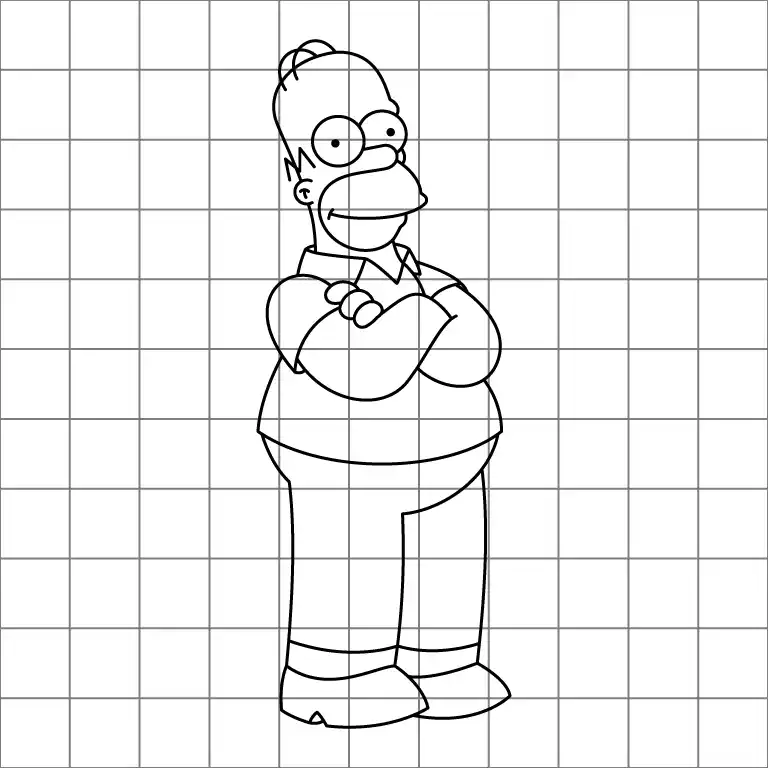
How To Draw The Simpson Step By Step

Step 1 - Sketch the Eyes, Nose, and Mouth
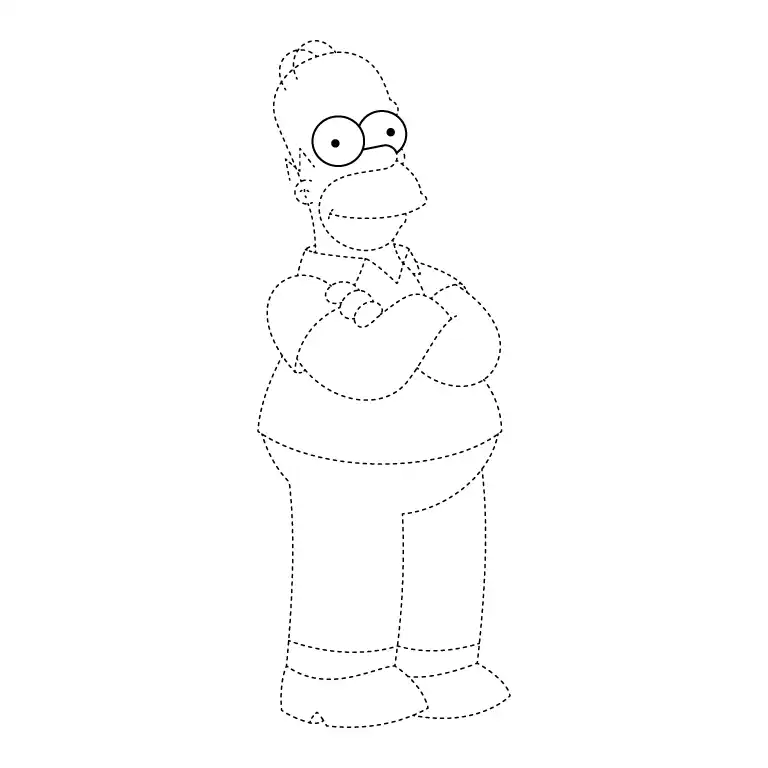
Start by drawing two large, round eyes next to each other. Add small pupils inside them. Then, draw a small curved line for the nose slightly overlapping the right eye. Below the nose, sketch a wide, curved mouth to capture Homer’s expression.

Step 2 - Outline the Head and Ear
Draw the outline of Homer’s head around the eyes and nose, creating his bald, oval-shaped head with two small curves on top. Add a small, rounded ear on the left side with a simple inner detail.

Step 3 - Sketch the Folded Arms
Sketch the outlines of Homer’s arms crossed over his chest. Start with two curved lines extending outward from the shoulders, then bend them to show them folded. Add simple hand outlines resting on the opposite arms.
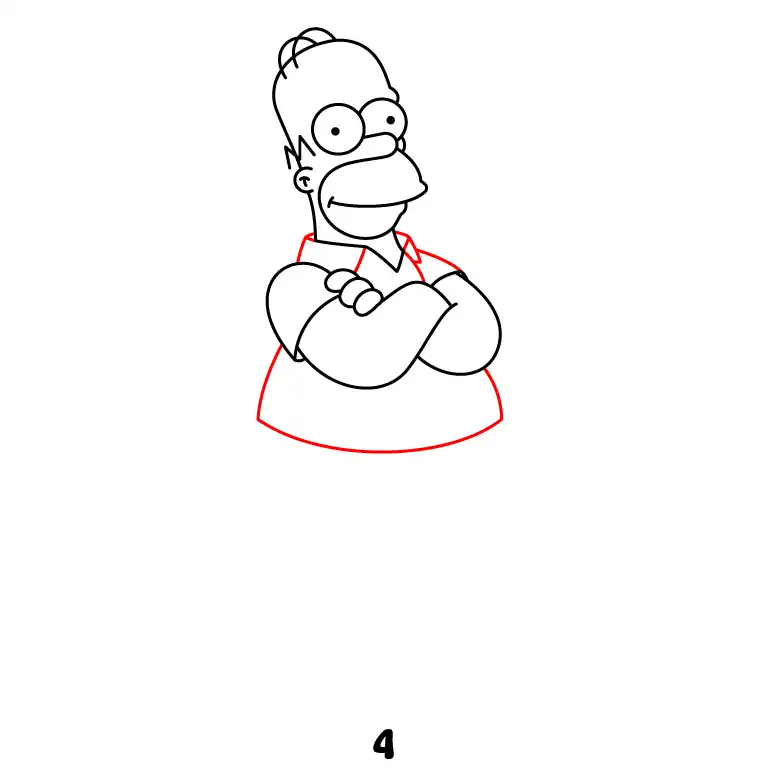
Step 4 - Draw the Collar and Shirt
Draw the triangular collar of Homer’s shirt just below his head. Then, extend two vertical lines downward to define the upper part of his torso, keeping it slightly wider as you go down.
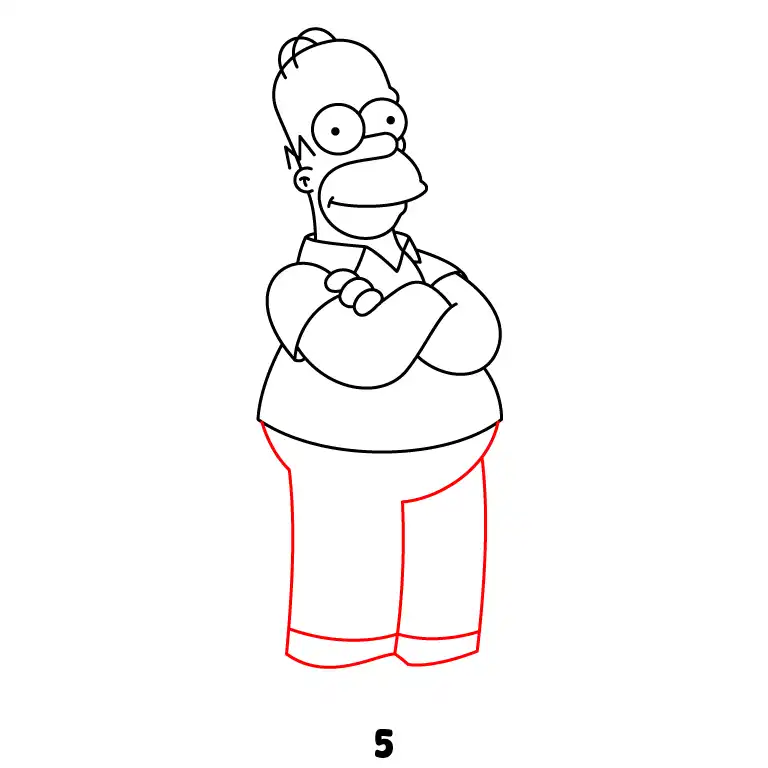
Step 5 - Add the Pants
Continue the drawing by extending lines further down to form Homer’s pants. Create a slightly rounded waistline and add vertical lines to give his legs shape.
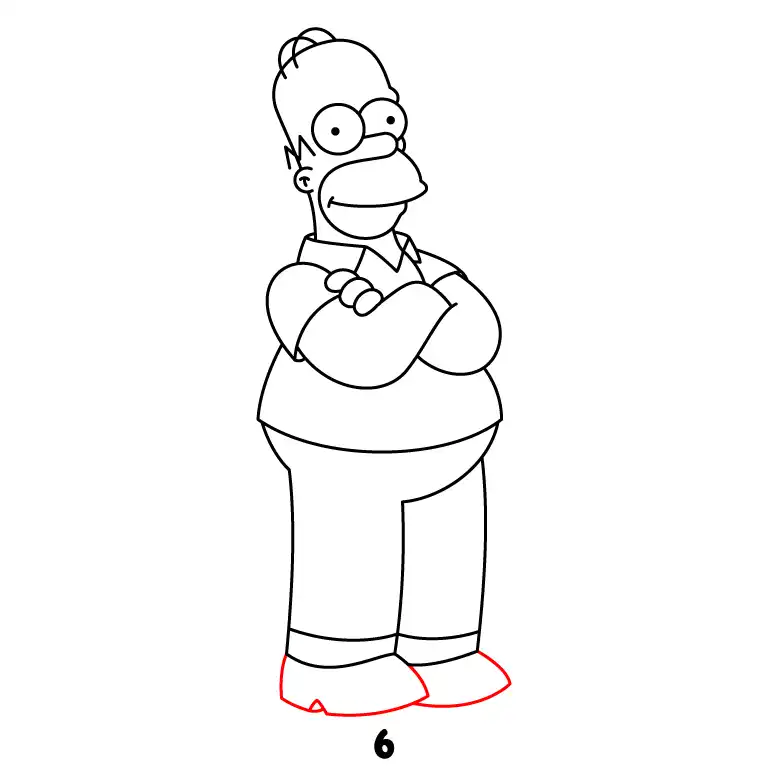
Step 6 - Draw the Shoes
At the bottom of the legs, sketch Homer’s shoes. They should be large and rounded, with simple curved lines to define their shape.
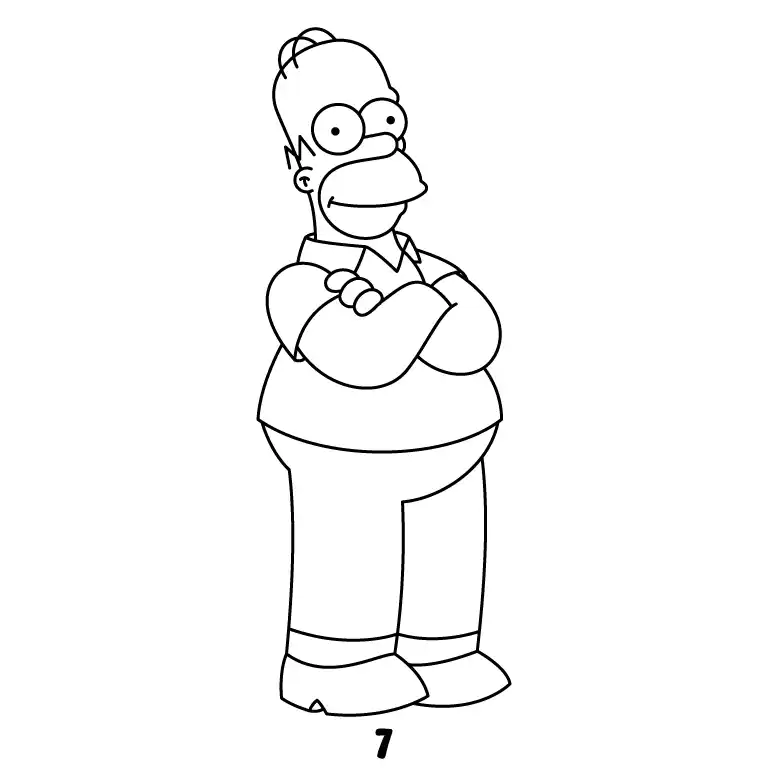
Step 7 - Finalize the Drawing
Go over the lines to smooth out any rough areas. Add any missing details like extra folds on his shirt and pants, and ensure everything is well-defined.


