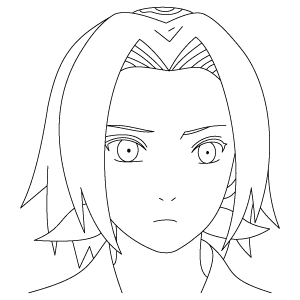
Start by drawing an oval shape for Frieza’s head, tapering it into a narrow chin at the bottom. Then, add the ears on each side, giving them angular shapes to match his distinct design.
Step 2 - Sketch the Facial Guidelines and Eyes
Draw light guidelines across the face to help position the features evenly. Then, sketch his sharp, narrow eyes along the guideline, giving them an intense expression that reflects his menacing look.
Step 3 - Add Facial Details
Detail the face by sketching a small, defined nose in the center of the guidelines. Below it, draw the mouth with a thin, sharp shape. Add cheek lines extending downward from the eyes toward the nose to emphasize the facial structure.
Step 4 - Draw the Upper Body Shape
Sketch the broad shoulders extending outward from the base of the head, then draw the upper chest structure with smooth, curved lines. Add vertical lines on both sides to define the torso shape and connect it naturally to the chest.
Step 5 - Define Chest and Abdomen Muscles
Draw the chest muscles by outlining two defined pectorals with a central sternum line running between them. Just below the chest, add the upper abdominal muscles, shaping them with curved lines to show structure and definition.
Step 6 - Add Shoulder and Rib Details
Refine the shoulders by sketching circular outlines to give them a rounded, strong form. Add light curved lines along the sides of the torso to indicate rib structure, and draw subtle lines near the lower torso to define the waist.
Step 7 - Sketch the Arms’ Outline
Draw the upper arms extending down from the shoulders, keeping them muscular and proportionate. Continue sketching the forearms with smooth, tapered lines. At the wrists, define the cuffs with clear bands to separate the arms from the hands.
Step 8 - Draw Detailed Arms and Hands
Add muscle contours along the arms by drawing smooth curved lines to define the biceps, triceps, and forearms. At the ends, sketch the palms open with the fingers spread out, making sure each finger is proportionate and clearly outlined.
Step 9 - Add Hand Details
Refine the hands by adding finger joints with small curved lines at each segment. Include palm lines to show natural creases, making the hands look more detailed and realistic.
Step 10 - Outline the Legs
Sketch the legs starting from the waist, keeping them strong and proportionate to the upper body. Draw the thighs wide at the top, then taper the calves downward. Finish by adding the feet at the bottom to complete the basic leg structure.
Step 11 - Add Tail and Feet Details
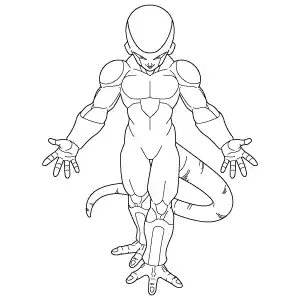
Draw Frieza’s long tail curling smoothly around the body, giving it a natural curve and thickness. Then, refine the feet by adding individual toes, shaping them clearly to complete the lower body details.
Step 12 - Detail Leg Muscles and Tail
Add muscular details on the legs by drawing curved lines along the thighs and calves to highlight definition. Refine the feet with subtle lines for structure. Then, sketch patterns and markings along the tail, following its curve to complete the design.
Step 13 - Finalize Frieza Drawing
Add the finishing touches by darkening and sharpening all outlines for clarity. Apply shading details to the face, chest, arms, and legs, focusing on muscles for depth. Add texture lines to the tail, cuffs, and torso markings to enhance realism. Finalize the drawing so Frieza’s figure looks complete and ready for coloring or further detailing.