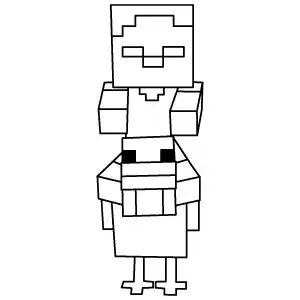
Start by drawing a big square for the zombie’s head. Inside the square, make the face using simple blocky shapes. Draw two square eyes and a wide, pixel-style mouth, just like the faces you see on Minecraft characters. Keep all the corners sharp to match the pixel look.
Step 2 – Add the Body and Arms
Below the head, draw a small rectangle for the zombie’s body. Then add two blocky arms on each side, making them long and straight. Keep all the shapes square and simple so the whole body matches the Minecraft style.
Step 3 – Start Drawing the Chicken’s Head
Under the zombie, start drawing the chicken by making a square for its head. Keep the shape simple and blocky. Then add the beak using a small rectangular shape, and draw two tiny square eyes. Use simple pixel-style shapes so the chicken looks just like it does in Minecraft.
Step 4 – Finish the Chicken’s Body and Zombie Legs
Draw the chicken’s blocky body right under its square head, keeping the shape simple and rectangular. Then add two long, thin legs with flat, pixel-style feet at the bottom for the zombie. Finally, draw the chicken’s wings on each side using small blocky shapes. This completes the chicken’s Minecraft-style body.
Step 5 – Complete the Chicken Jockey Drawing
Go over your drawing and darken the final lines to make everything clear and bold. Carefully erase any extra or overlapping sketch lines so the shapes look clean. Once everything is neat, your Minecraft Chicken Jockey drawing is complete!