Start by drawing a simple circle that will serve as the center of Flower’s blossom, making sure it is smooth and round since it will be the base for adding the petals around it.
Step 2 - Add Flower Petals
Surround the center circle with seven large petals, spacing them evenly around it. Make sure the petals overlap slightly with each other to create a natural and realistic blossom appearance.
Step 3 - Sketch the Flower Stem
Draw a wavy, vertical stem extending downward from the flower head, keeping the curve gentle and flowing. Make sure the stem connects smoothly to the center circle of the blossom for a natural look.
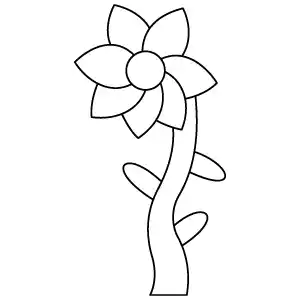
Step 4 - Draw the Flower Leaves
Add three leaves on each side of the stem, placing them alternately to create balance. Make the leaves slightly curved and pointed, ensuring they look natural and flow with the stem’s shape.
Step 5 - Finalize the Flower Outline
Complete the outline by carefully refining the stem and leaves, smoothing out any uneven lines. Ensure all parts connect naturally and clearly so the flower looks neat and ready for coloring or further detailing.