This playful black-and-white drawing of PickyPiggy features a cheerful pose and fun details, like the bitten apple it’s holding. Perfect for coloring enthusiasts, this sheet lets you experiment with a variety of colors and add your own creative touch to the character.
PickyPiggy is shown in a vibrant pink shade with a bright red apple and lively expression. The colorful design highlights the character’s joyful personality and can serve as inspiration for your own artistic projects or color combinations.
This traceable version of PickyPiggy features light outlines for easy tracing. Whether you’re practicing your art skills or just enjoying a relaxing activity, the clear details make it fun and simple to replicate this adorable character.
This dotted-line version of PickyPiggy is great for tracing practice. Follow the dots to complete the design and enhance your hand control and precision. It’s an engaging activity for artists of any skill level who enjoy exploring fun designs.
How To Draw PickyPiggy Step By Step
This step-by-step guide will help you draw PickyPiggy, a cheerful and playful character with a big smile and an apple in hand. Follow the steps to draw her large ears, curly tail, and heart detail on her chest. Use the reference image to match the proportions and details for the best results. Grab your pencils and start drawing PickyPiggy!

Step 1 - Drawing the Facial Features
Start by sketching the key features of the face, including two round eyes, a small curved nose, and a wide, cheerful mouth. Add small details like the eyebrows and curved lines to define the smile and expression.
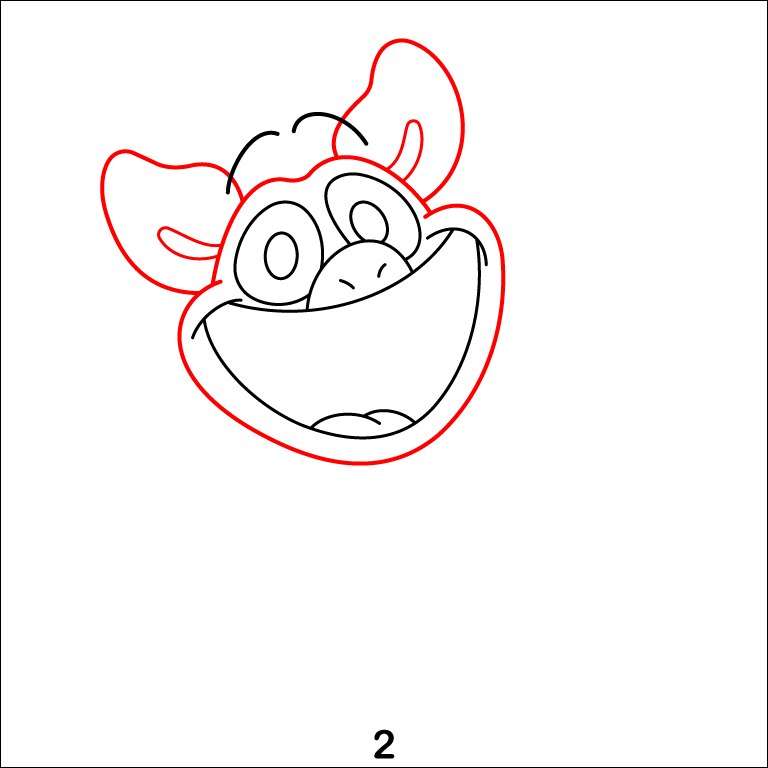
Step 2 - Adding the Face Outline
Next, draw the outline of the face, ensuring it frames the facial features. Include large, rounded ears on either side of the head, giving the character its distinctive appearance.
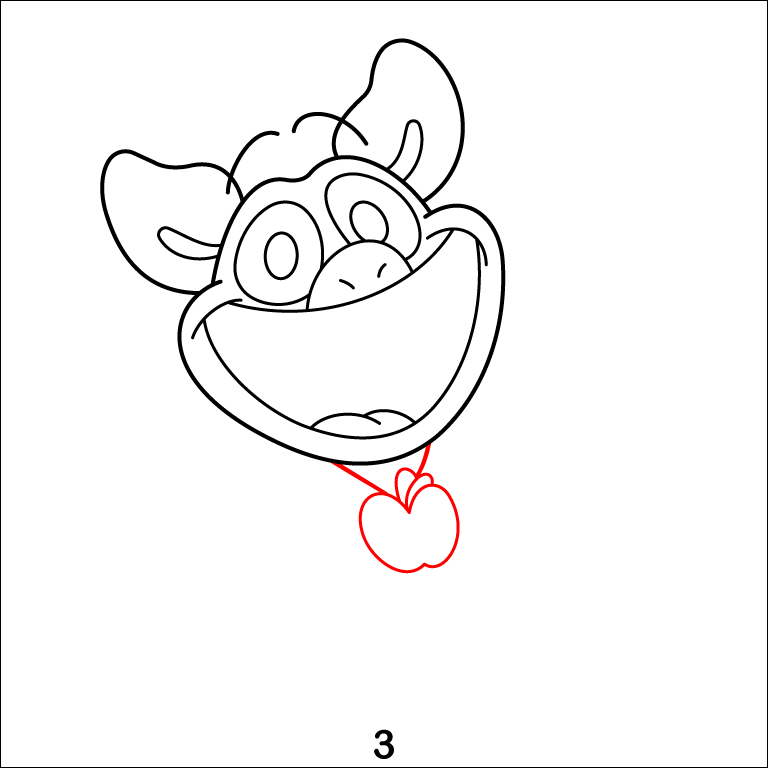
Step 3 - Adding the Apple Emblem
Draw the apple emblem below the chin, connecting it with two short lines. Make the emblem detailed by outlining the apple shape with a small leaf on top.
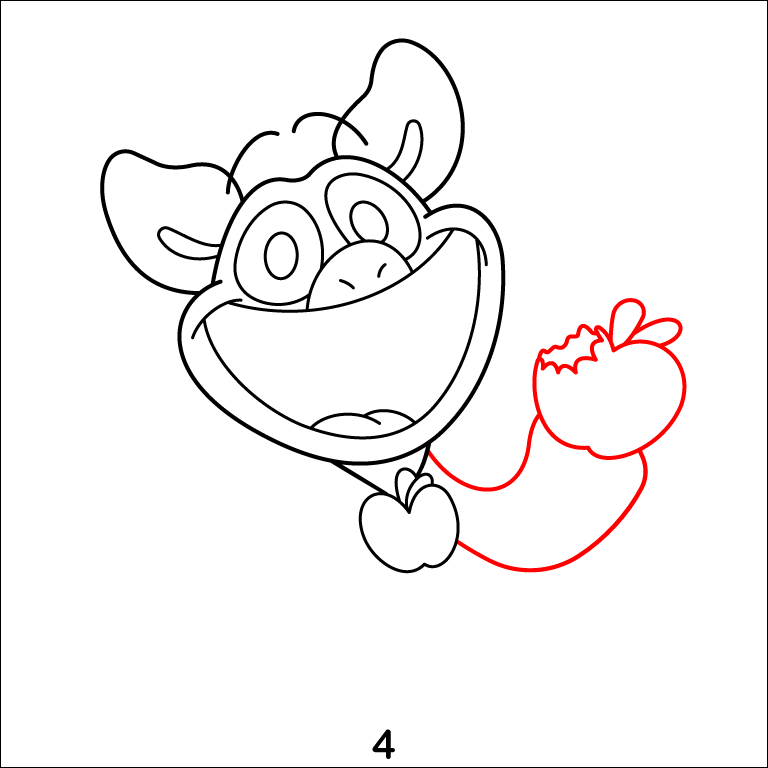
Step 4 - Drawing the Right Hand Holding an Apple
Sketch the right arm extending outward, ending in a hand holding a bitten apple. Add details like the bitten edge and leaf on the apple for extra character.
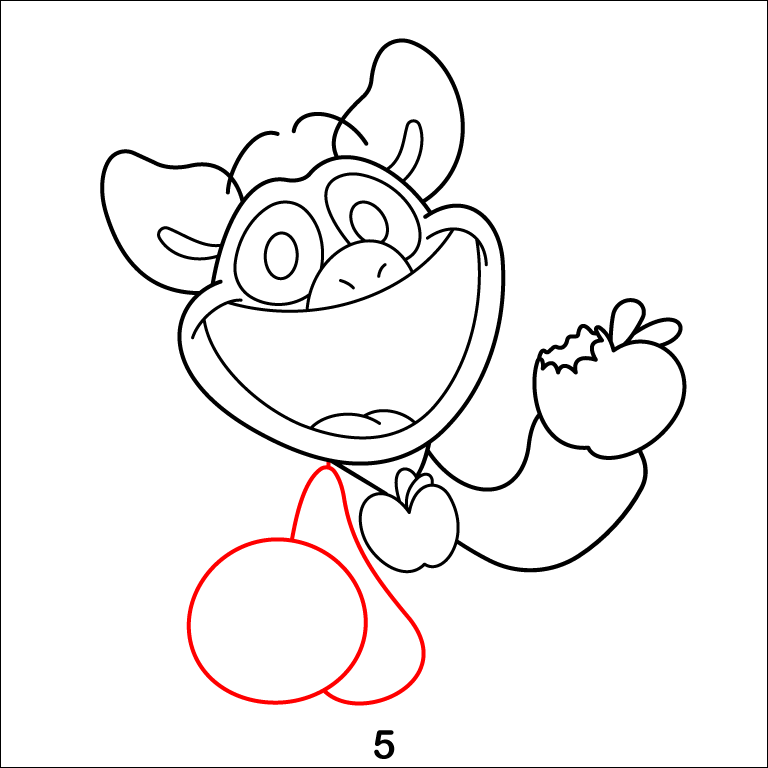
Step 5 - Drawing the Left Hand and Left Leg
Draw the left arm bent and the left leg positioned forward. Ensure the proportions match the body for a balanced look.
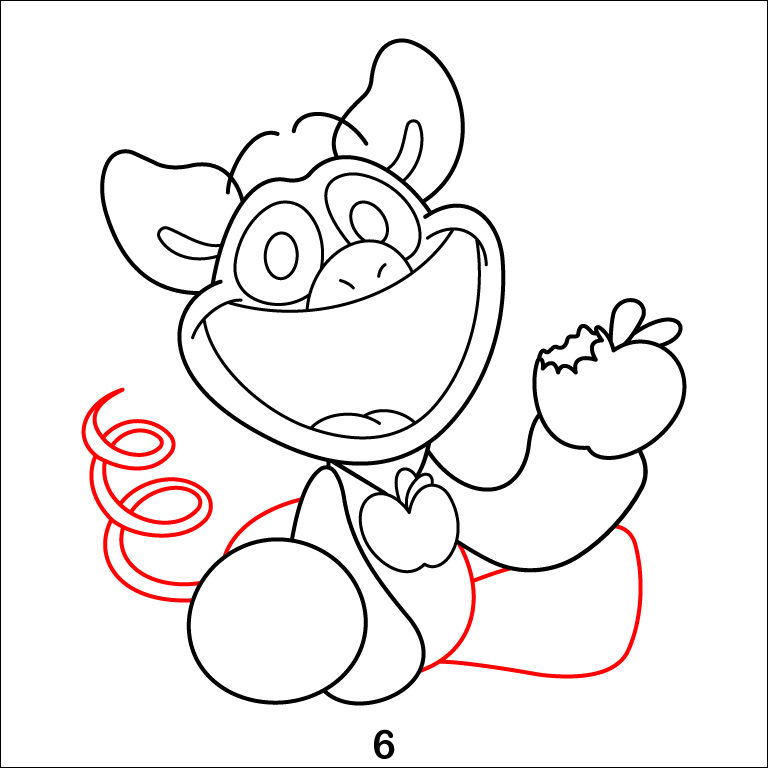
Step 6 - Drawing the Right Leg and Tail
Add the right leg extending backward and a curled tail behind the character. Use curved lines to make the tail dynamic and flowing.
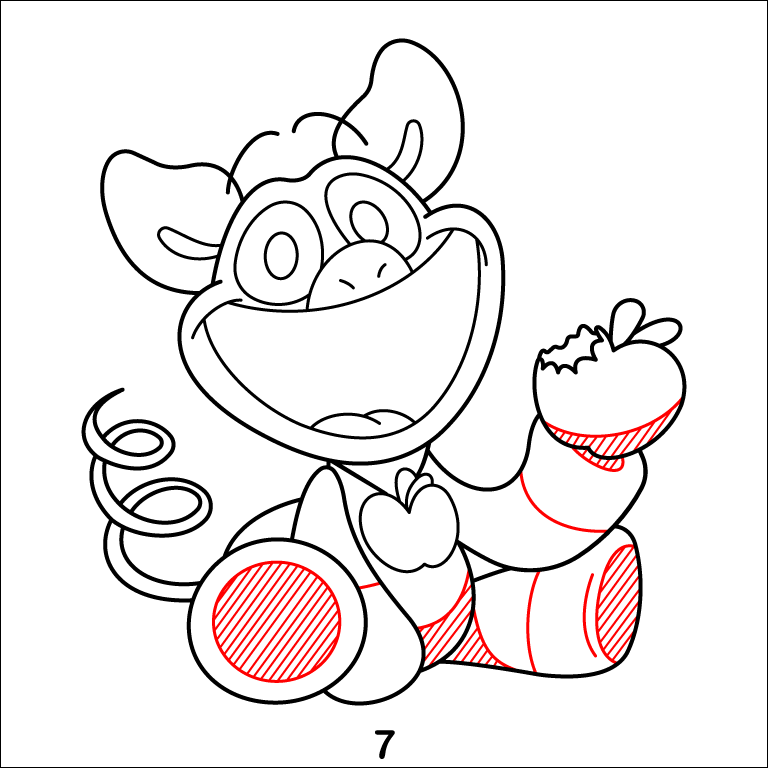
Step 7 - Adding Patterns and Stripes
Draw patterns and stripes on the arms, legs, and body for a playful look. Include simple curved lines and details to enhance the design.
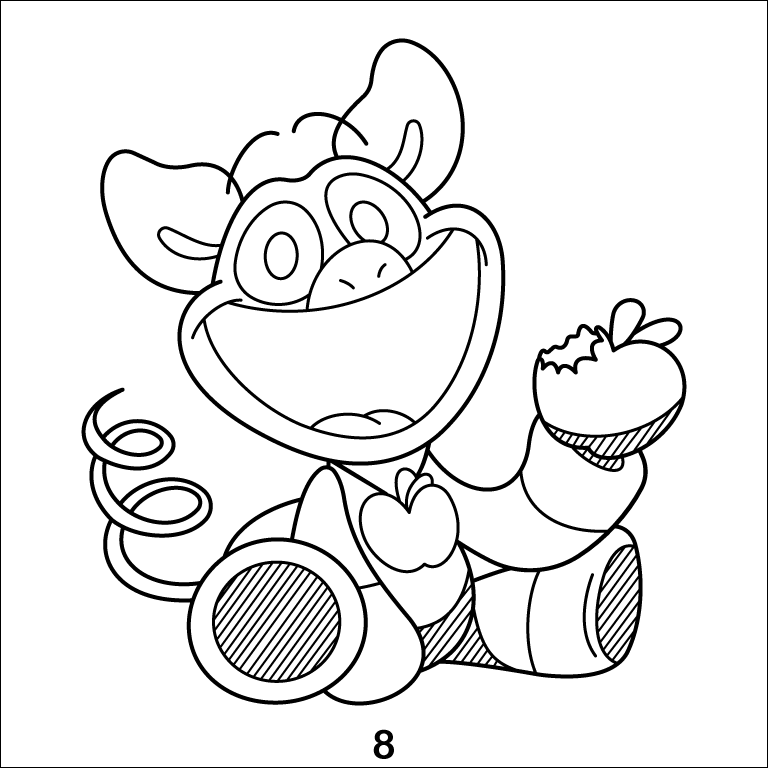
Step 8 - Finalizing the Drawing
Complete the drawing by reviewing and finalizing all the details. Ensure the lines are clean, and every feature is well-defined. The character should now be fully detailed and ready for coloring!


